If you’re a gamer or a graphic designer, you know how important a good graphics card is. But what happens when your graphics card fails? In this troubleshooting guide, we’ll show you how to diagnose a failed graphics card. We’ll cover the common symptoms of a failed graphics card, such as screen flickering, display issues, and system crashes. We’ll also go over the steps you can take to test your graphics card and determine if it’s the source of the problem. With this guide, you’ll be able to identify and fix the issue with your graphics card, so you can get back to enjoying your favorite games and design projects.
What is a Graphics Card?
Components of a Graphics Card
A graphics card, also known as a display or video card, is a hardware component responsible for rendering images and videos on a computer screen. It is an essential component of a computer system, particularly for tasks that require intensive graphics processing, such as gaming, video editing, and graphic design.
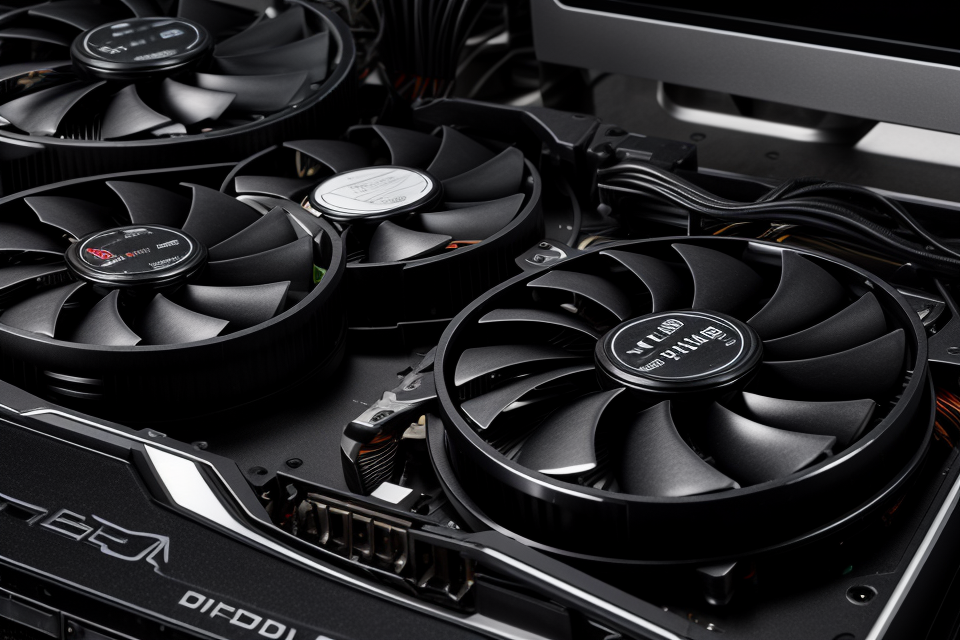
The graphics card is composed of several components that work together to deliver high-quality graphics. The following are the key components of a graphics card:
- GPU (Graphics Processing Unit): This is the primary component of the graphics card, responsible for rendering images and videos. It is designed to perform complex mathematical calculations that are required to produce high-quality graphics.
- Memory: The graphics card also has its own memory, which is used to store data that is being processed by the GPU. This memory is usually faster than the system memory, which helps to improve performance.
- Outputs: The graphics card has one or more outputs, such as HDMI, DVI, or DisplayPort, which are used to connect the card to a monitor or other display device.
- Power Supply: The graphics card requires its own power supply to operate, which is typically provided by the PCIe slot on the motherboard. Some high-end graphics cards may require additional power connectors.
- Cooling System: To prevent the graphics card from overheating, it is equipped with a cooling system, which may include a fan or heatsink. This helps to keep the card running smoothly and prevent damage to the components.
Understanding the components of a graphics card is essential for diagnosing and troubleshooting issues that may arise. By identifying the specific component that has failed, you can take the necessary steps to repair or replace the card, ensuring that your computer system is running smoothly and efficiently.
Importance of a Graphics Card
The graphics card is responsible for converting the data from the computer’s memory into an image that can be displayed on the screen. It performs this task by using a combination of hardware and software to accelerate the graphics processing pipeline. The graphics card also handles tasks such as 3D rendering, shading, and texture mapping, which are critical for producing high-quality images and videos.
In addition to its primary function, the graphics card also plays a crucial role in maintaining the overall performance of the computer system. It can significantly impact the system’s overall performance, particularly when running resource-intensive applications. Therefore, it is essential to ensure that the graphics card is functioning correctly to avoid performance issues and other related problems.
Common Symptoms of a Failed Graphics Card
Blue Screen of Death (BSOD)
A Blue Screen of Death (BSOD) is an error screen displayed by the Windows operating system when it encounters a critical error from which it cannot recover. This error can occur for a variety of reasons, including a failed graphics card. If you are experiencing a BSOD, it is important to troubleshoot the issue as soon as possible to avoid data loss and other problems.
One of the most common causes of a BSOD is a malfunctioning graphics card. If your graphics card is failing, it can cause a variety of issues, including display problems, system crashes, and other errors. In some cases, a failing graphics card may even cause your computer to fail to boot up entirely.
If you are experiencing a BSOD, the first step in diagnosing the issue is to determine whether it is related to your graphics card. To do this, you will need to run a memory diagnostic test and a hardware diagnostic test. These tests can help identify any issues with your hardware, including your graphics card.
If the memory diagnostic test or hardware diagnostic test indicates that there is an issue with your graphics card, you will need to replace the card. This may require opening up your computer case and removing the old card, and then installing a new one. If you are not comfortable performing this task yourself, you may need to seek the assistance of a professional.
In summary, a Blue Screen of Death (BSOD) can be caused by a variety of issues, including a malfunctioning graphics card. If you are experiencing a BSOD, it is important to troubleshoot the issue as soon as possible to avoid data loss and other problems. One of the first steps in diagnosing the issue is to run a memory diagnostic test and a hardware diagnostic test to determine whether the problem is related to your graphics card. If the tests indicate that there is an issue with your graphics card, you will need to replace the card.
Freezing or Stuck on One Game
One of the most common symptoms of a failed graphics card is when a computer freezes or gets stuck on one game. This can happen when the graphics card is no longer able to handle the demands of the game, causing the system to freeze or become unresponsive. Here are some possible causes of this issue:
- Overheating: When a graphics card gets too hot, it can cause the system to freeze or become unresponsive. This is because the card is no longer able to function properly, leading to a failure in the graphics output.
- Insufficient power supply: If the power supply unit (PSU) is not providing enough power to the graphics card, it can cause the system to freeze or become unresponsive. This is because the card is not receiving enough power to function properly, leading to a failure in the graphics output.
- Faulty drivers: Outdated or corrupt graphics card drivers can also cause the system to freeze or become unresponsive. This is because the drivers are not able to communicate properly with the graphics card, leading to a failure in the graphics output.
- Faulty hardware: In some cases, a failed graphics card can cause the system to freeze or become unresponsive. This is because the card is no longer able to function properly, leading to a failure in the graphics output.
If you are experiencing issues with your computer freezing or getting stuck on one game, it is important to troubleshoot the problem to determine the root cause. By identifying the cause of the issue, you can take the necessary steps to fix the problem and get your computer running smoothly again.
Random Crashes or Shutdowns
When a graphics card fails, it can cause random crashes or shutdowns of the computer. This can happen during normal use or while playing games. Here are some common signs of a failing graphics card that may cause random crashes or shutdowns:
- Screen freezes or blacks out: When a graphics card fails, it can cause the screen to freeze or black out. This can happen suddenly and without warning, and the computer may not respond to any input.
- System crashes or shuts down: A failing graphics card can also cause the entire system to crash or shut down. This can happen during gaming or other intensive tasks, and the computer may not restart until the graphics card is replaced.
- Blue screen of death: In some cases, a failing graphics card can cause a blue screen of death (BSOD) error. This is a serious error that can indicate a hardware failure, and it may require a complete system reinstallation or replacement of the graphics card.
- Gaming glitches or graphical artifacts: A failing graphics card can also cause glitches or graphical artifacts in games. This can include visual distortions, texture issues, or other strange visual effects that are not normal for the game.
If you experience any of these symptoms, it’s important to diagnose the problem as soon as possible. A failing graphics card can cause serious damage to the rest of the system, and it may require a complete system replacement if not addressed promptly.
Screen Flickering or Artifacts
When a graphics card fails, one of the most common symptoms that a user may experience is screen flickering or artifacts. This can manifest in a variety of ways, such as:
- Intermittent flickering or flashing of the screen
- Colored lines or shapes appearing on the screen
- Screen freezing or becoming unresponsive
- Display resolution or refresh rate issues
These symptoms can be caused by a number of different factors, including overheating, electrical issues, or malfunctioning components within the graphics card itself. To diagnose the issue, it’s important to first check the graphics card’s power supply and ensure that it is properly seated in the PCIe slot. Additionally, it may be necessary to clean the graphics card’s fans or replace them if they are not functioning properly.
If the issue persists, it may be necessary to test the graphics card with a different PCIe slot or even replace the card entirely. In some cases, a failed graphics card may also cause issues with other components of the computer, such as the motherboard or CPU, so it’s important to thoroughly test all components to ensure that the issue is not being caused by something else.
How to Diagnose a Failed Graphics Card
Checking for Physical Damage
One of the first steps in diagnosing a failed graphics card is to check for any physical damage. Physical damage can be caused by a variety of factors, such as overheating, poor airflow, or a manufacturing defect. It is important to thoroughly inspect the graphics card for any signs of physical damage, as this can indicate a serious problem that may require replacement of the card.
To check for physical damage, start by removing the graphics card from the computer case. Look for any visible signs of damage, such as bent or broken pins, scratches, or dents. It is also important to check for any signs of discoloration or burning, which can indicate overheating or other problems.
Next, inspect the graphics card for any signs of loose components, such as memory chips or capacitors. These components can become loose over time due to vibration or other factors, and can cause problems with the card’s operation.
If you notice any signs of physical damage, it is important to disconnect the power supply from the graphics card and contact a professional technician for further diagnosis and repair. Physical damage can be difficult to repair and may require a replacement of the graphics card.
Testing the Graphics Card
Testing the graphics card is an essential step in diagnosing a failed graphics card. This section will discuss the various methods to test the graphics card and determine if it is the cause of the issue.
Visual Inspection
The first step in testing the graphics card is to perform a visual inspection. Check for any visible signs of damage, such as bent or broken pins on the graphics card or the motherboard. Also, ensure that the graphics card is properly seated in its slot and not blocking any other components.
GPU-Z
GPU-Z is a free utility that provides detailed information about the graphics card, including the model, BIOS version, and driver version. It can also display the temperature and power consumption of the graphics card. To use GPU-Z, download and install the software from the official website, then run the program to view the graphics card information.
Memtest86
Memtest86 is a free memory testing software that can be used to test the graphics card‘s memory. To use Memtest86, download and install the software from the official website, then boot the computer from the Memtest86 disc or USB drive. Select the “Stability Test” option and run the test for at least 24 hours to ensure that the graphics card’s memory is functioning correctly.
FurMark
FurMark is a free graphics card stress testing software that can be used to test the graphics card‘s stability and performance. To use FurMark, download and install the software from the official website, then run the program to stress test the graphics card for a few minutes. If the graphics card fails the stress test, it may indicate a failed graphics card.
Gaming Test
A gaming test is a practical way to test the graphics card‘s performance and stability. To perform a gaming test, select a demanding game and run it on the computer. If the graphics card fails to perform, it may indicate a failed graphics card.
In conclusion, testing the graphics card is a crucial step in diagnosing a failed graphics card. Visual inspection, GPU-Z, Memtest86, FurMark, and gaming tests are some of the methods that can be used to test the graphics card and determine if it is the cause of the issue.
Using GPU-Z to Monitor GPU Usage
GPU-Z is a lightweight utility tool that provides detailed information about the graphics card installed in your computer. It can be used to monitor the GPU usage, temperature, and other critical parameters of the graphics card. By using GPU-Z, you can diagnose whether your graphics card is failing or not.
To use GPU-Z, follow these steps:
- Download and install GPU-Z from the official website.
- Launch GPU-Z and select the graphics card that you want to monitor.
- Check the GPU usage, temperature, and other parameters of the graphics card.
- If the GPU usage is abnormally high or the temperature is unusually high, it may indicate a failure in the graphics card.
- If you notice any abnormalities, it is recommended to check the graphics card for any physical damage or malfunction.
GPU-Z can also be used to compare the performance of different graphics cards. By monitoring the GPU usage and temperature of different graphics cards, you can determine which card performs better under load.
It is important to note that GPU-Z should be used with caution, as excessive usage can cause damage to the graphics card. It is recommended to monitor the graphics card parameters regularly and avoid overloading the card.
Overall, GPU-Z is a useful tool for diagnosing a failed graphics card. By monitoring the GPU usage and temperature, you can determine whether the graphics card is functioning properly or not.
Using MSI Afterburner to Monitor GPU Temperature
One of the most effective ways to diagnose a failed graphics card is by monitoring its temperature. MSI Afterburner is a popular tool that can help you keep track of your GPU’s temperature. This utility provides a comprehensive overview of your graphics card’s performance, allowing you to monitor key metrics such as clock speeds, power consumption, and temperature.
Here’s how you can use MSI Afterburner to monitor GPU temperature:
- Download and install MSI Afterburner on your computer.
- Open the software and click on the “Monitoring” tab.
- Locate the “GPU Load” section and click on the “GPU Core Temperature” sensor.
- The temperature reading will be displayed in real-time, allowing you to monitor your GPU’s temperature as you run your games or applications.
If your GPU’s temperature exceeds the manufacturer’s recommended limit, it could indicate a failure. In such cases, it’s recommended to immediately shut down your system and seek professional assistance to diagnose and fix the issue.
In addition to monitoring temperature, MSI Afterburner can also help you optimize your graphics card’s performance by adjusting clock speeds and power limits. By using this tool, you can ensure that your graphics card is operating within safe temperature limits and is delivering optimal performance.
Overall, MSI Afterburner is a powerful tool that can help you diagnose and troubleshoot a wide range of graphics card issues, including failed cards. By monitoring your GPU’s temperature and performance metrics, you can quickly identify potential problems and take action to fix them before they become more serious.
Benchmarking Tests to Check Performance
Benchmarking tests are a useful tool to diagnose a failed graphics card. These tests compare the performance of the graphics card to other cards with similar specifications, and can help identify any issues that may be causing the card to fail. There are several types of benchmarking tests that can be used, including gaming benchmarks, synthetic benchmarks, and real-world benchmarks.
Gaming benchmarks involve running popular games to test the performance of the graphics card. These tests can help identify any issues with frame rates, graphics quality, and other gaming-related performance issues. Some popular gaming benchmarks include 3DMark and Unigine Heaven and Superposition.
Synthetic benchmarks are designed to test specific aspects of graphics card performance, such as fill rate, shader performance, and memory bandwidth. These tests can help identify any issues with specific features of the graphics card. Some popular synthetic benchmarks include 3DMark06 and Unigine Sky Diver.
Real-world benchmarks involve running real-world applications to test the performance of the graphics card. These tests can help identify any issues with performance in specific applications, such as video editing or gaming. Some popular real-world benchmarks include Heaven and Superposition.
To perform benchmarking tests, it is important to use a reliable testing tool and to run the tests several times to ensure accurate results. It is also important to compare the results of the benchmarking tests to the specifications of the graphics card to determine if there are any issues with performance. If the benchmarking tests reveal any issues with the graphics card, it may be necessary to replace the card or update the drivers to improve performance.
How to Fix a Failed Graphics Card
Updating Graphics Card Drivers
The Importance of Updating Graphics Card Drivers
Graphics card drivers are software programs that allow your graphics card to communicate with your computer’s operating system. These drivers are essential for ensuring that your graphics card functions correctly and can display images and videos correctly. Over time, these drivers can become outdated, which can cause compatibility issues, errors, and even hardware failure. Therefore, updating your graphics card drivers is a crucial step in troubleshooting a failed graphics card.
How to Update Graphics Card Drivers
Updating your graphics card drivers is relatively simple and can be done in a few steps:
- Determine which graphics card you have installed in your computer. You can usually find this information in the device manager or by checking the manufacturer’s website.
- Go to the manufacturer’s website of your graphics card and search for the latest driver update. Make sure to download the driver that is compatible with your operating system and graphics card model.
- Once you have downloaded the driver, run the installation file and follow the prompts to install the new driver. It is essential to follow the installation process carefully to avoid any errors or conflicts.
- After the installation is complete, restart your computer and check if the graphics card is functioning correctly.
Common Issues with Updating Graphics Card Drivers
While updating graphics card drivers is generally a straightforward process, there are some common issues that you may encounter:
- Compatibility issues: Ensure that you download the correct driver for your graphics card and operating system. Incorrect drivers can cause compatibility issues and may even damage your hardware.
- Conflicts with other software: Updating graphics card drivers can sometimes conflict with other software programs installed on your computer. To avoid conflicts, it is essential to ensure that your computer is free from viruses and malware before updating your graphics card drivers.
- Installation errors: It is essential to follow the installation process carefully to avoid any errors or conflicts. If you encounter any errors during the installation process, try restarting your computer and attempting the installation again.
In conclusion, updating your graphics card drivers is a crucial step in troubleshooting a failed graphics card. By following the correct procedures and ensuring that you download the correct drivers for your graphics card and operating system, you can resolve compatibility issues, errors, and even hardware failure.
Cleaning the Graphics Card
When dealing with a failed graphics card, the first step in fixing the issue is to clean the card. Dust and debris can accumulate over time, causing the card to overheat and fail. Here are the steps to follow when cleaning a graphics card:
- Shut down your computer and unplug it from the power source.
- Open the case of your computer and locate the graphics card.
- Gently remove the graphics card from the PCIe slot.
- Use a can of compressed air to blow out any dust or debris that may be present on the card.
- Use a soft, dry cloth to wipe down the card and remove any remaining dust or debris.
- Reinsert the graphics card into the PCIe slot and reconnect your computer to the power source.
- Turn on your computer and check to see if the graphics card is still failing.
It is important to be careful when handling the graphics card, as it can be delicate and prone to damage. If you are unsure about how to clean the card or if you are not comfortable doing so, it is recommended to seek the assistance of a professional. Additionally, it is important to keep the graphics card clean to prevent future failures and ensure optimal performance.
Reinstalling the Graphics Card
Reinstalling the graphics card is a common solution for a failed graphics card. The process involves physically removing the card from the computer and replacing it. This method can be effective if the problem is caused by a loose connection or a faulty installation. Here are the steps to follow when reinstalling the graphics card:
- Shut down and unplug the computer: Before starting the process, make sure to shut down the computer and unplug it from the power source.
- Open the case: Open the computer case to access the graphics card. This can be done by removing the screws that hold the case together.
- Disconnect the power supply: Disconnect the power supply from the graphics card to avoid any electrical shock.
- Remove the graphics card: Carefully remove the graphics card from the PCI-E slot.
- Clean the slot: Use a can of compressed air to blow any dust or debris out of the PCI-E slot.
- Reinstall the graphics card: Carefully insert the graphics card back into the PCI-E slot, making sure it is properly seated.
- Reconnect the power supply: Reconnect the power supply to the graphics card.
- Close the case: Close the computer case and secure it with the screws.
- Power on the computer: Power on the computer and check if the graphics card is working properly.
Reinstalling the graphics card can be a simple solution for a failed graphics card, but it is important to make sure that the computer is properly grounded and that all necessary precautions are taken to avoid any electrical shock. If the problem persists after reinstalling the graphics card, it may be necessary to try other troubleshooting methods.
Replacing the Graphics Card
When it comes to fixing a failed graphics card, one of the most effective solutions is to replace the faulty card with a new one. Here are the steps you can follow to replace your graphics card:
- Carefully remove the graphics card from the PCIe slot.
- Remove the thermal paste from the old card and clean the CPU socket and the new card.
- Apply a small amount of new thermal paste to the new card.
- Place the new card into the PCIe slot and secure it.
- Close the case and plug in your computer.
- Boot up your computer and test the new graphics card.
It’s important to note that when replacing a graphics card, it’s essential to ensure that the new card is compatible with your computer’s motherboard and power supply. Additionally, it’s always a good idea to back up your important data before making any changes to your computer’s hardware.
In conclusion, replacing the graphics card is a simple and effective solution for fixing a failed graphics card. By following the steps outlined above, you can easily install a new card and get your computer up and running again.
Final Thoughts and Recommendations
- Replacing the Graphics Card: If all other troubleshooting steps have failed, the only remaining solution is to replace the graphics card. This is a more permanent solution as it involves replacing the faulty card with a new one. It is recommended to go for a reputable brand when purchasing a new graphics card.
- Monitoring Temperatures: Always monitor the temperature of the graphics card while running games or other graphically intensive programs. If the temperature gets too high, it can cause the graphics card to fail. To avoid this, ensure that the graphics card is properly cooled and that the case has adequate ventilation.
- Regular Maintenance: Regular maintenance is important in ensuring that the graphics card remains in good condition. Dust accumulation can cause the graphics card to overheat, so it is important to clean the card regularly. It is also important to keep the drivers up to date to ensure optimal performance.
- Seeking Professional Help: If you are not confident in your ability to diagnose and fix the problem, it is recommended to seek professional help. A professional technician can provide a more thorough diagnosis and may be able to offer a more permanent solution.
Overall, diagnosing and fixing a failed graphics card can be a complex process that requires patience and attention to detail. However, by following the steps outlined in this guide, you can effectively diagnose and fix the problem, or seek professional help if necessary.
FAQs
1. What are the common symptoms of a failed graphics card?
The common symptoms of a failed graphics card include:
* No display or distorted display on the monitor
* Graphics artifacts such as lines or dots on the screen
* Screen freezing or flickering
* The computer not recognizing the graphics card
* The computer not booting up or crashing during startup
2. How can I test my graphics card to see if it’s failed?
To test your graphics card, you can try the following steps:
* Check the connections: Make sure the graphics card is properly seated in the PCIe slot and all cables are securely connected.
* Check the BIOS settings: Restart your computer and enter the BIOS settings by pressing the key during startup. Check if the graphics card is detected in the BIOS.
* Use the manufacturer’s diagnostic tools: Many graphics card manufacturers provide diagnostic tools that can test the card’s functionality. These tools can be downloaded from the manufacturer’s website.
* Use third-party diagnostic tools: There are also third-party diagnostic tools available that can test the graphics card. One popular tool is GPU-Z, which can be downloaded for free from the manufacturer’s website.
3. How do I replace a failed graphics card?
Replacing a failed graphics card involves the following steps:
* Shut down and unplug your computer: Shut down your computer and unplug it from the power source.
* Open the case: Open the case of your computer and locate the graphics card.
* Disconnect the power cable: Disconnect the power cable from the graphics card.
* Remove the graphics card: Carefully remove the graphics card from the PCIe slot.
* Install the new graphics card: Place the new graphics card in the PCIe slot and connect the power cable.
* Reconnect the case and power up the computer: Reconnect the case and power up the computer.
4. How long does it take to replace a failed graphics card?
The time it takes to replace a failed graphics card can vary depending on your experience with computer hardware and the specific graphics card you are installing. It can take anywhere from 15 minutes to an hour or more, depending on the complexity of the installation.
5. How much does it cost to replace a failed graphics card?
The cost of replacing a failed graphics card can vary depending on the brand and model of the card, as well as the cost of labor. Generally, a budget graphics card can cost anywhere from $50 to $150, while a high-end graphics card can cost $500 or more. Labor costs can vary depending on your location and the technician’s hourly rate.