Is your Windows 10 graphics card causing you trouble? With so many graphics cards on the market, it can be hard to know which one is right for you. But don’t worry, we’ve got you covered. In this article, we’ll show you how to troubleshoot common graphics card issues on Windows 10. Whether you’re experiencing slow performance, crashing, or black screens, we’ll guide you through the steps to resolve the issue. So, sit back, relax, and let’s get started!
Troubleshooting common graphics card issues on Windows 10 involves several steps. First, you should check if the graphics card is properly seated in its slot and if all cables are securely connected. If the issue persists, you can try updating the graphics card driver or rolling back to a previous version. Additionally, running a GPU stress test can help identify any potential hardware issues. If the problem still exists, it may be necessary to perform a clean boot or uninstall and reinstall the graphics card. Lastly, if none of these steps work, it may be a hardware failure and the graphics card may need to be replaced.
Understanding Graphics Card Issues
Symptoms of Graphics Card Issues
- Slow or stuttering performance: One of the most common symptoms of a graphics card issue is a slow or stuttering performance in games or other graphics-intensive applications. This can be caused by a variety of factors, including overheating, driver issues, or hardware failures.
- Graphical glitches or artifacts: Another common symptom of a graphics card issue is the appearance of graphical glitches or artifacts, such as flickering, lines, or distortion. These can be caused by issues with the graphics card itself, or with the connection between the graphics card and the monitor.
- No output or black screen: In some cases, a graphics card issue can cause the computer to produce no output or display a black screen. This can be caused by a variety of factors, including a faulty graphics card, a problem with the connection between the graphics card and the monitor, or an issue with the display settings.
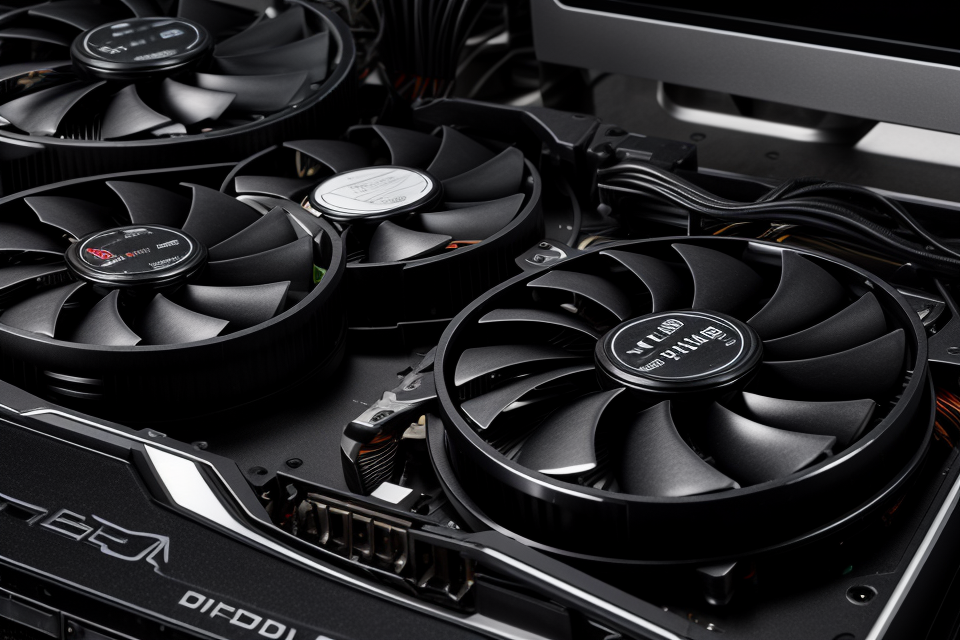
- Fans not spinning or making noise: If the graphics card has a problem, the fans may not spin or make any noise. This could be caused by a failure in the fan itself, or by an issue with the graphics card’s power supply.
- Blue screen error: A blue screen error (also known as the “Blue Screen of Death”) can indicate a serious problem with the graphics card or other hardware component. If you see a blue screen error, it’s important to troubleshoot the issue as soon as possible to prevent further damage to your system.
Causes of Graphics Card Issues
Graphics card issues can arise due to a variety of reasons. Here are some common causes:
- Overheating: When the graphics card gets too hot, it can malfunction or even get damaged. This can be caused by dust buildup, clogged fans, or a malfunctioning cooling system.
- Incompatible drivers: Outdated or incompatible graphics card drivers can cause issues with graphics performance, display, or even system crashes.
- Faulty hardware: A faulty graphics card can cause a range of issues, from display problems to system crashes.
- Conflicting software: Some software applications may conflict with the graphics card, causing issues with display or performance.
- Insufficient power supply: If the power supply is not sufficient to support the graphics card, it may not function properly or may even get damaged.
- Faulty settings: Incorrect settings in the graphics card control panel or Windows settings can cause issues with display or performance.
It is important to identify the root cause of the graphics card issue in order to troubleshoot it effectively.
Troubleshooting Graphics Card Issues
Checking the Graphics Card Driver
Importance of Updating Graphics Card Drivers
Ensuring that your graphics card driver is up-to-date is crucial for optimal performance and to avoid potential issues. Graphics card drivers are responsible for translating the commands from the operating system to the graphics card, allowing it to render images and videos. Outdated drivers can cause compatibility problems, stability issues, and reduced performance.
How to Update Graphics Card Drivers
Updating your graphics card driver is relatively straightforward. Here’s a step-by-step guide:
- Visit the manufacturer’s website: Locate the website of the graphics card manufacturer, such as NVIDIA or AMD.
- Download the latest driver: Search for the latest graphics card driver for your specific model and operating system. You may need to create an account or sign in to access the download section.
- Run the installer: Once the download is complete, run the installer file and follow the on-screen instructions to install the new driver. It’s essential to ensure that the system is not in use during the installation process to avoid interruptions.
- Restart your computer: After the installation is complete, restart your computer to ensure that the new driver is properly installed and loaded.
It’s recommended to backup your current driver settings before updating, as new drivers may alter settings or introduce new features that may require adjustments. Additionally, be cautious of third-party drivers or modded drivers, as they may cause instability or other issues. Always obtain drivers from the official manufacturer’s website to ensure compatibility and security.
Checking the Graphics Card Settings
- Verifying the Graphics Card Installed Correctly:
- Ensure that the graphics card is properly seated in its slot and not obstructed by any nearby components.
- Check if the card is connected to the power source and the display port is properly connected.
- Updating the Graphics Card Driver:
- Navigate to the Device Manager, expand the ‘Display Adapters’ section, right-click on the graphics card and select ‘Update driver’.
- If the update is available, it will be automatically downloaded and installed.
- Adjusting Graphics Card Settings:
- Access the ‘NVIDIA Control Panel’ or ‘AMD Radeon Settings’ and adjust the settings to match the capabilities of the graphics card.
- Adjust settings such as ‘Power Management’, ‘Texture Filtering Quality’, and ‘Antialiasing’.
- Disabling Overlay Programs:
- Overlay programs such as MSI Afterburner or RGB Fusion can interfere with the graphics card’s performance.
- Disable any overlay programs and restart the computer to see if the issue is resolved.
Running Diagnostic Tests
One of the first steps in troubleshooting graphics card issues on Windows 10 is to run diagnostic tests. These tests can help identify any problems with the graphics card and provide guidance on how to fix them.
There are several diagnostic tests that can be run on a graphics card, including:
- DirectX Diagnostic Tool: This tool is built into Windows 10 and can help identify any issues with DirectX, which is a collection of APIs that are used to run games and other graphics-intensive applications.
- Display Driver Uninstaller (DDU): This is a third-party tool that can be used to safely and completely remove any graphics drivers that may be causing issues.
- 3DMark: This is a benchmarking tool that can be used to test the performance of the graphics card and identify any issues that may be affecting performance.
- GPU-Z: This is a lightweight utility that provides detailed information about the graphics card, including clock speeds, memory usage, and more.
To run these diagnostic tests, follow these steps:
- Open the Windows 10 search bar and type in “DirectX Diagnostic Tool”.
- Click on the “DirectX Diagnostic Tool” app to open it.
- Select the “Display” tab and click on the “Test” button to run the test.
- If the test passes, then the graphics card is working properly. If it fails, then there may be an issue with the graphics card that needs to be addressed.
- To run the Display Driver Uninstaller, download and install the tool from the official website.
- Once installed, open the tool and select the graphics card from the list of installed drivers.
- Click on the “Clean” button to safely remove the driver.
- Restart the computer and let Windows 10 automatically install the latest graphics driver.
- To run 3DMark, download and install the tool from the official website.
- Once installed, open the tool and select the type of test you want to run (e.g. Time Spy, Fire Strike, etc.).
- Follow the on-screen instructions to run the test and generate a report.
- To run GPU-Z, download and install the tool from the official website.
- Once installed, open the tool and select the graphics card from the list of installed devices.
- Check the “Specs” tab for detailed information about the graphics card.
By running these diagnostic tests, you can get a better understanding of the state of your graphics card and identify any issues that may be causing problems.
Graphics Card Failure
Identifying Graphics Card Failure
Identifying graphics card failure is crucial as it can cause significant issues with your system’s performance and stability. There are several signs that may indicate a problem with your graphics card, including:
- Display issues: If you experience display issues such as ghosting, artifacts, or distortion, it may be a sign of a faulty graphics card.
- System crashes: If your system crashes or freezes randomly, it could be due to a graphics card failure.
- No display: If your system does not display anything on the screen, it may be a sign of a graphics card failure.
- Fan failure: If the graphics card fan stops working or makes unusual noises, it may be a sign of a problem with the graphics card.
To diagnose a graphics card failure, you can try running a GPU stress test program to see if the graphics card is functioning correctly. You can also check the device manager for any error messages related to the graphics card.
If you suspect a graphics card failure, it is recommended to test the graphics card on another system to rule out any compatibility issues. If the problem persists, you may need to replace the graphics card.
Fixing Graphics Card Failure
Graphics card failure can be caused by a variety of factors, including overheating, malfunctioning hardware, or driver issues. In this section, we will explore some troubleshooting steps that can help fix common graphics card failure issues on Windows 10.
Step 1: Check for overheating
Overheating is one of the most common causes of graphics card failure. To check if your graphics card is overheating, you can use the following steps:
- Open the Task Manager by pressing
Ctrl + Shift + Esc. - Go to the
Performancetab. - Look for the
Graphicscolumn and check the temperature of your graphics card.
If the temperature is high, you may need to clean the dust from your graphics card or upgrade your cooling system.
Step 2: Update your graphics card drivers
Outdated graphics card drivers can cause compatibility issues and lead to graphics card failure. To update your graphics card drivers, follow these steps:
- Open the Device Manager by pressing
Win + Xand selectingDevice Manager. - Expand the
Display adapterssection. - Right-click on your graphics card and select
Update driver. - Choose the
Search automatically for updated driver softwareoption. - Windows will search for and install the latest graphics card drivers.
Step 3: Reinstall the graphics card drivers
If updating the drivers did not fix the issue, you may need to reinstall the graphics card drivers. To do this, follow these steps:
- Open the Device Manager and expand the
Display adapterssection. - Right-click on your graphics card and select
Uninstall device. - Confirm the uninstallation and restart your computer.
- Windows will automatically reinstall the graphics card drivers.
Step 4: Run graphics diagnostic tests
If none of the above steps fix the issue, you may need to run graphics diagnostic tests to identify any hardware problems. To do this, follow these steps:
- Open the Windows Start menu and search for
Display settings. - Click on
Graphics settings. - Under
Related settings, click onHardware acceleration. - Click on
Test. - Windows will run a series of tests to check for any hardware problems.
By following these troubleshooting steps, you should be able to fix common graphics card failure issues on Windows 10.
Replacing the Graphics Card
Checking the Compatibility of the New Graphics Card
Before installing a new graphics card, it is essential to ensure that it is compatible with your system. To do this, follow these steps:
- Check the form factor: Make sure the new graphics card fits in your computer case. The standard form factors are Low Profile, Half-Height, and Full-Height.
- Check the power supply: Verify that your power supply unit (PSU) can handle the new graphics card’s power requirements. Typically, graphics cards require a 300W or higher PSU. Check the manufacturer’s specifications for both the graphics card and the PSU.
- Check the PCIe slot: Make sure the new graphics card fits in your motherboard’s PCIe slot. Ensure that the graphics card’s PCIe version and size (x16, x8, x4) are compatible with your motherboard.
- Check the BIOS settings: Restart your computer and enter the BIOS settings. Look for any graphics card-related settings, such as enabling the PCIe slot or disabling onboard graphics. Ensure the settings are configured correctly for the new graphics card.
- Check for driver updates: Ensure that you have the latest graphics card drivers from the manufacturer’s website. Installing the correct drivers can improve performance and fix compatibility issues.
- Check for conflicts: Check for any hardware or software conflicts that may affect the new graphics card’s performance. Disable any unnecessary programs or drivers that may interfere with the graphics card.
By following these steps, you can ensure that your new graphics card is compatible with your system and ready to use.
Installing the New Graphics Card
When replacing a graphics card, it is important to follow the proper steps to ensure a smooth installation process. Here are the steps to follow:
- Shut down and unplug your computer: Before you begin the installation process, it is important to shut down your computer and unplug it from the power source. This will prevent any accidental damage to your computer or the graphics card during the installation process.
- Remove the old graphics card: To install a new graphics card, you must first remove the old one. To do this, you will need to open your computer’s case and locate the graphics card. Once you have located it, gently remove it from the PCIe slot.
- Clean the PCIe slot: Before installing the new graphics card, it is important to clean the PCIe slot to ensure a secure fit. Use a can of compressed air to blow any dust or debris out of the slot.
- Install the new graphics card: Once the PCIe slot is clean, gently insert the new graphics card into the slot. Make sure that the card is properly seated and secured in the slot.
- Connect the graphics card: Next, connect the graphics card to your power supply and monitor. If your graphics card has an HDMI port, you can connect it to your monitor using an HDMI cable. If your graphics card has a DVI or DisplayPort, you can connect it to your monitor using a DVI or DisplayPort cable.
- Power on your computer: Once you have connected the graphics card, you can power on your computer and see if the new graphics card is working properly.
By following these steps, you can successfully install a new graphics card in your computer and resolve any graphics card issues you may have been experiencing.
Preventing Graphics Card Issues
Updating the Graphics Card Driver
Importance of Keeping Graphics Card Drivers Up-to-Date
Keeping your graphics card drivers up-to-date is crucial for ensuring optimal performance and stability. Outdated drivers can cause compatibility issues, system crashes, and even hardware failure. Regularly updating your graphics card drivers can help prevent these problems and improve the overall performance of your graphics card.
Steps to Update Graphics Card Drivers on Windows 10
- Check for updates automatically: Windows 10 has a built-in feature that automatically checks for and installs updates for your graphics card drivers. To enable this feature, go to Settings > Update & Security > Windows Update and make sure that “Check for updates” is turned on.
- Check for updates manually: If you prefer to check for updates manually, you can do so by going to the manufacturer’s website and downloading the latest graphics card driver for your specific model. Be sure to only download drivers from trusted sources to avoid downloading potentially harmful software.
- Install updates manually: Once you have downloaded the latest graphics card driver, you can install it manually by following the manufacturer’s instructions. Be sure to back up your system before installing any updates to prevent data loss.
By following these steps, you can ensure that your graphics card drivers are always up-to-date, which can help prevent common issues and improve the performance of your graphics card.
Adjusting the Graphics Card Settings
One of the most effective ways to prevent graphics card issues on Windows 10 is by adjusting the graphics card settings. The following are some steps that can be taken to adjust the graphics card settings:
- Changing the Graphics Card Settings in the Control Panel
To access the graphics card settings, open the Control Panel on your Windows 10 computer. In the Control Panel, click on “Hardware and Sound,” and then click on “Change display settings.” From there, you can adjust the resolution, refresh rate, and other settings related to your graphics card.
2. Updating the Graphics Card Driver
Keeping your graphics card driver up to date is crucial for optimal performance and to prevent issues. To update the graphics card driver, go to the manufacturer’s website and download the latest driver for your graphics card model.
3. Disabling Overlay
Some games have an overlay that can interfere with the graphics card’s performance. To disable the overlay, open the game’s settings and look for an option to disable the overlay.
4. Adjusting Power Management Settings
Power management settings can also affect the performance of your graphics card. To adjust the power management settings, open the Control Panel, click on “Hardware and Sound,” and then click on “Power Options.” From there, you can adjust the settings to ensure that your graphics card is not being overpowered.
5. Disabling the Windows Aero Theme
The Windows Aero theme can also affect the performance of your graphics card. To disable the Windows Aero theme, right-click on the desktop and select “Personalize.” From there, you can select a different theme or turn off the Aero theme.
By following these steps, you can adjust the graphics card settings on your Windows 10 computer and prevent common issues.
Monitoring the Graphics Card Performance
To prevent graphics card issues, it is essential to monitor the performance of the graphics card. This can be done by following these steps:
- Check for Overheating:
- Overheating is one of the most common causes of graphics card failure.
- Check the temperature of the graphics card using the task manager or third-party software.
- If the temperature is high, adjust the power settings, increase ventilation, or consider upgrading the cooling system.
- Check for Drivers Updates:
- Graphics card drivers are responsible for managing the communication between the graphics card and the computer.
- Regularly check for updates and install them as soon as they are available.
- Updating the drivers can improve performance, fix bugs, and enhance compatibility with new software.
- Check for Conflicting Software:
- Some software may conflict with the graphics card, causing issues such as screen flickering or crashing.
- Check for any conflicting software and remove or disable them if necessary.
- Some examples of conflicting software include antivirus programs, overlays, and third-party utilities.
- Check for Incorrect Settings:
- Incorrect settings in the graphics card can cause issues such as display resolution or refresh rate.
- Check the settings in the graphics card and make sure they are set to the correct values.
- Some examples of incorrect settings include refresh rate, display resolution, and power management.
- Check for Malware:
- Malware can cause damage to the graphics card and other components of the computer.
- Regularly scan the computer for malware and remove any detected threats.
- Use reputable antivirus software and keep it up to date.
By monitoring the graphics card performance, you can detect and prevent common issues that may arise. Regular maintenance and updates can help extend the lifespan of the graphics card and ensure optimal performance.
FAQs
1. What are some common graphics card issues on Windows 10?
Some common graphics card issues on Windows 10 include:
- GPU driver issues: Outdated or corrupt graphics card drivers can cause system crashes, display issues, and other problems.
- Overheating: Overheating can cause graphics cards to shut down, leading to display issues or system crashes.
- Incorrect settings: Incorrect graphics card settings in the Windows Control Panel can cause display issues or other problems.
- Incompatible software: Some software programs may not be compatible with certain graphics cards, leading to crashes or other issues.
- Hardware failure: Faulty hardware components, such as the graphics card itself, can cause a variety of problems.
2. How do I check if my graphics card is working properly?
To check if your graphics card is working properly, follow these steps:
- Press the Windows key + X on your keyboard and select “System” from the menu.
- Click on “Advanced system settings” in the right-hand pane.
- In the “System Properties” window, go to the “Hardware” tab and click on “Device Installation Settings.”
- Make sure that “Latest compatible driver” is selected and then click “OK.”
- Restart your computer and check if the graphics card is working properly.
3. How do I update my graphics card driver on Windows 10?
To update your graphics card driver on Windows 10, follow these steps:
- Press the Windows key + X on your keyboard and select “Device Manager” from the menu.
- Locate your graphics card in the list of devices and click on it to expand its properties.
- Click on “Update driver” and then “Search automatically for updated driver software.”
- Windows will search for the latest graphics card driver and install it on your system.
4. How do I fix graphics card overheating issues on Windows 10?
To fix graphics card overheating issues on Windows 10, follow these steps:
- Check your computer’s cooling system to make sure it is functioning properly. Dust and debris can accumulate over time and block the cooling system, causing overheating.
- Make sure that your graphics card is seated properly in its slot and that all cables are securely connected.
- Check your power supply unit (PSU) to make sure it is functioning properly and can handle the demands of your graphics card.
- Check your graphics card’s fan and make sure it is spinning properly. If the fan is faulty, it may need to be replaced.
- If you have a case with a built-in fan controller, make sure it is set to the correct speed for your graphics card.
- Consider using a graphics card stress test program to see if the card is running at its maximum potential.
5. What should I do if my graphics card is not working at all?
If your graphics card is not working at all, try the following troubleshooting steps:
- Make sure that your graphics card is properly seated in its slot and that all cables are securely connected.
- Check your power supply unit (PSU) to make sure it is functioning properly and can handle the demands of your graphics card.
- Check your graphics card’s fan and make sure it is spinning properly. If the fan is faulty, it may need to be replaced.
- Try running a graphics card stress test program to see if the card is working properly.
- If none of these steps work, it may be a hardware failure and you may need to replace the graphics card.